Installation and Setup
This guide will enable you to leverage the full potential of the AIH.CLI tool in your data integration and management tasks. This documentation will cover the installation process, how to run the tool, and the methods for bulk exporting and importing data using the CLI.
Installation#
The first step in utilizing the AIH.CLI is to download the tool onto your local machine.
You can download the tool here:
Configuration#
Once you have downloaded the AIH CLI tool, the next step is to configure it for use. This involves specifying the AIH system's location (i.e., the server address) and providing the necessary credentials for login. This configuration ensures that the CLI tool can successfully connect to the AIH system (see in details) .
Running the AIH.CLI Tool#
Program runs through a terminal or command line prompt.
Steps to run the AIH.CLI:
- Open Terminal or Command Line: Access your terminal (MacOS/Linux) or command line prompt (Windows).
- Navigate to AIH CLI File: Use the command line to navigate to the directory where the AIH.CLI.exe file is located. This can be done using the cd (change directory) command followed by the path to the file.
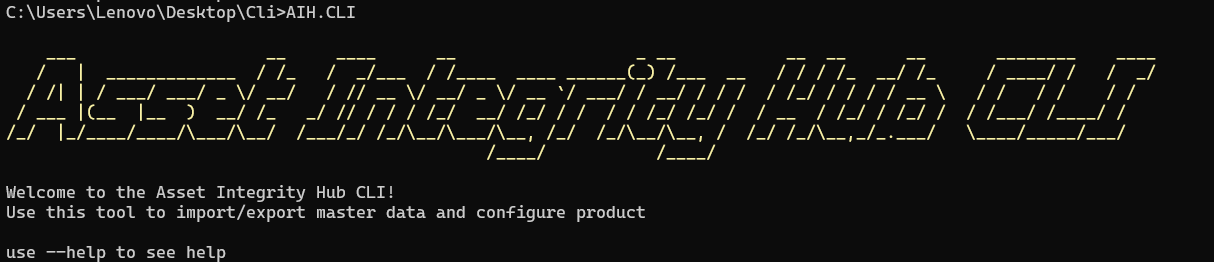
- Run the Program: Once in the correct directory, enter 'AIH.CLI' in the command line and press Enter. This action will execute the AIH CLI tool.
On running the AIH CLI tool, you should see a welcome screen, as shown in the image below. This indicates that the program has started successfully.
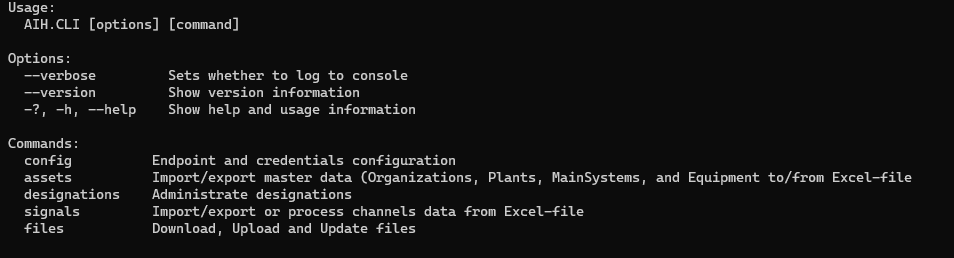
Getting help#
To access help for any command in the AIH CLI, simply append the --help or -h option to the command. This will display detailed information about the command, including its purpose, syntax, and options.
Setting the parameters#
| Parameter | Is Mandatory | Description |
|---|---|---|
| AssetsUrl | No | Url to Assets API - Mandatory for Assets module |
| SignalsUrl | No | Url to Signals API - Mandatory for Signals module |
| FilesUrl | No | Url to Files API - Mandatory for Files, Assets or Designations module |
| DesignationsUrl | No | Url to Designations API - Mandatory for Designations or Assets module |
| Authority | Yes | Url to Identity API |
| ClientId | Yes | Username for a system user(not your personal user account) |
| ClientSecret | Yes | Password for the system user |
Setting up a config file#
To enable the AIH.CLI to access your environment data, a configuration file named config.json that includes the necessary endpoint information and verification details needs to be created and properly configured. This file is a key component in ensuring the CLI tool can successfully interact with your AIH environment.
Type the following command to create a configuration file:
AIH.CLI config generate
This command will create a config.json file in the directory where the AIH.CLI is installed. If you don’t find it there, check your root directory.
When first generated, the config.json file will be empty, looking like this:
{ "DesignationsUrl": "", "AssetsUrl": "", "DataProcessingUrl": "", "FilesUrl": "", "SignalsUrl": "", "ProcessUrl": "", "ClientId": "", "ClientSecret": "", "Authority": ""}Օpen the file in a text editor of your choice and fill in the fields. For instance:
{ "DesignationsUrl": "https://designations.uat.zevit.assetintegrityhub.com", "AssetsUrl": "https://assets.uat.zevit.assetintegrityhub.com", "DataProcessingUrl": "https://dataprocessing.uat.zevit.assetintegrityhub.com", "FilesUrl": "https://files.uat.zevit.assetintegrityhub.com", "SignalsUrl": "https://signals.uat.zevit.assetintegrityhub.com", "ProcessUrl": "https://process.uat.zevit.assetintegrityhub.com", "ClientId": "", "ClientSecret": "", "Authority": "https://idsvr.uat.zevit.assetintegrityhub.com"}Replace the URLs and credentials with those specific to your environment.
Exporting data#
Exporting data from the AIH system using the CLI involves executing a specific command that instructs the CLI to retrieve data from the AIH system and save it as an Excel file (.xlsx) in a designated location on your machine.
The command for exporting data from AIH system is structured as follows:
AIH.CLI <domain> export <option> <path-to-file>
In this command:
<domain>should be replaced with the specific area of the AIH system you are importing data into, such as designations, assets, etc.<path-to-file>is a placeholder that you need to replace with the actual file path where you want the exported .xlsx file to be stored.
Importing data#
Importing data to the AIH system using the CLI involves executing a specific command that directs the CLI to upload data from an Excel file (.xlsx) located on your machine into the AIH system. This functionality is crucial for integrating external data into the AIH environment efficiently.
The command to import data into the AIH system is structured as follows:
AIH.CLI <domain> import <option> <path-to-file>
In this command:
<domain>should be replaced with the specific area of the AIH system you are importing data into, such as designations, assets, etc.<option>may be used to specify additional import options as required by the specific domain.<path-to-file>is a placeholder that you need to replace with the actual file path containing the data you wish to import.
Formatting requirements are specified in the domain-specific guide for the data you are importing. Each domain in the AIH system may have unique data format and structure requirements.